Application of re-bar
The latest processing guidelines (method statement) must be observed when applying re-bar. They provide detailed information on the individual application steps. On-site conditions and the quality of the concrete substrate must be checked as preparatory work. re-bar is screwed together with screw couplers and cut to size according to the project requirements.
The applications of the different possibilities are shown below. In addition to bending or shear reinforcement, re-bar can also be used for the seismic strengthening of masonry.
re-bar in groove (on the deck or laterally)
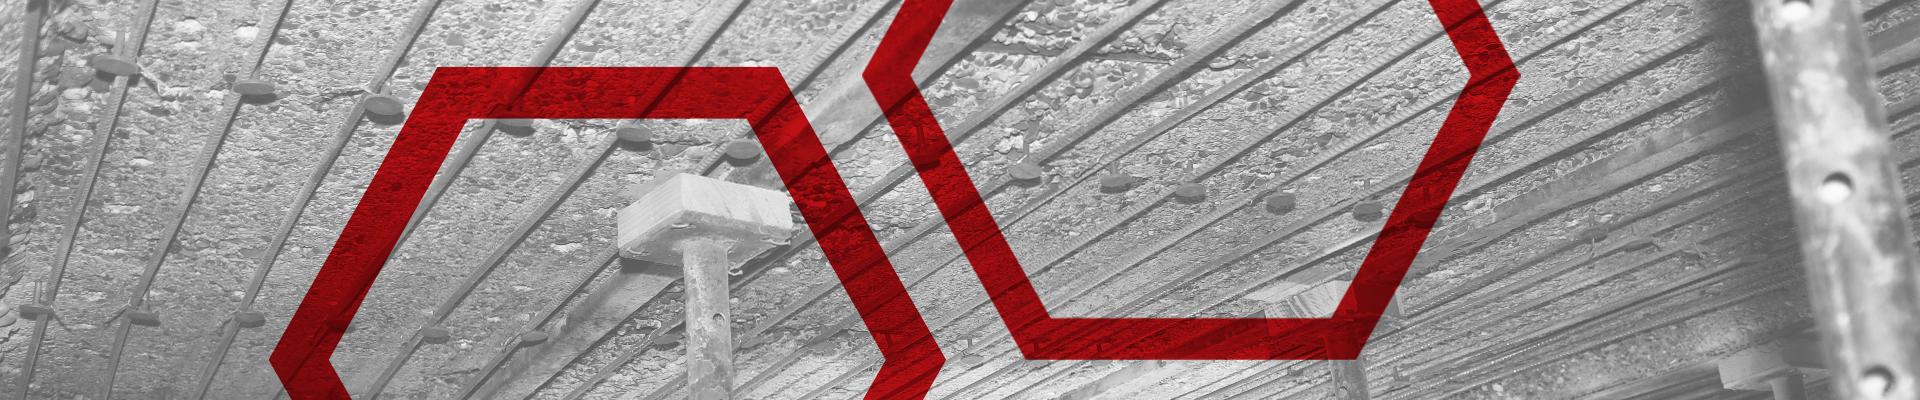
Preparation
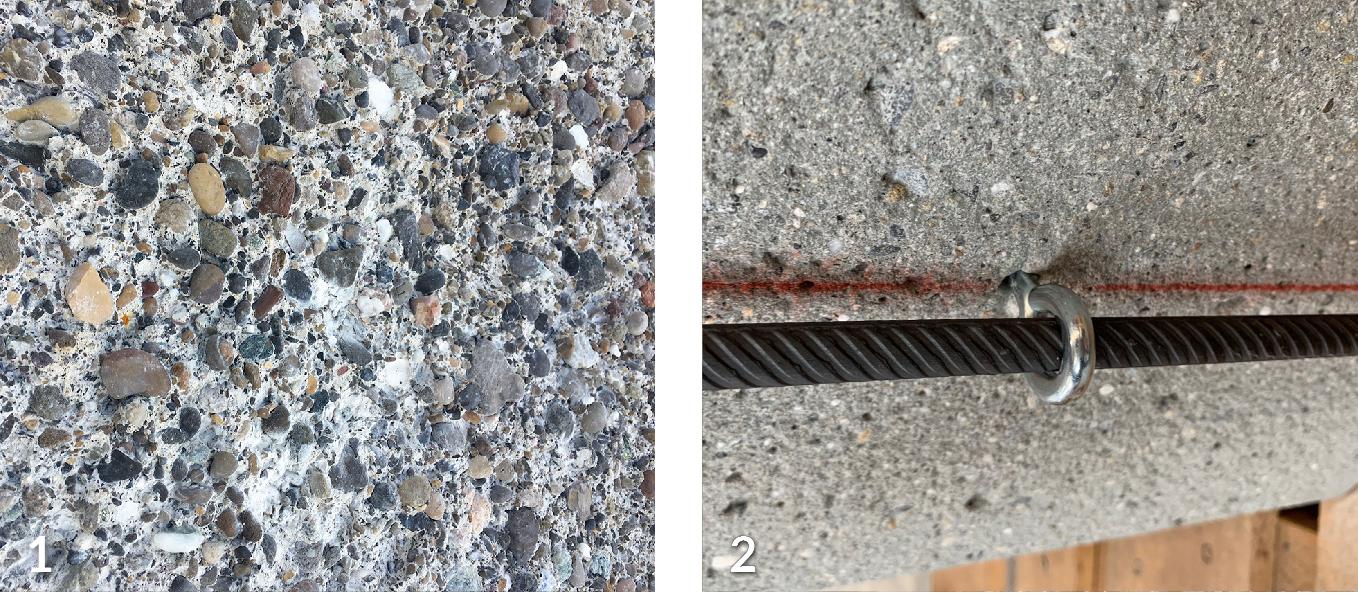
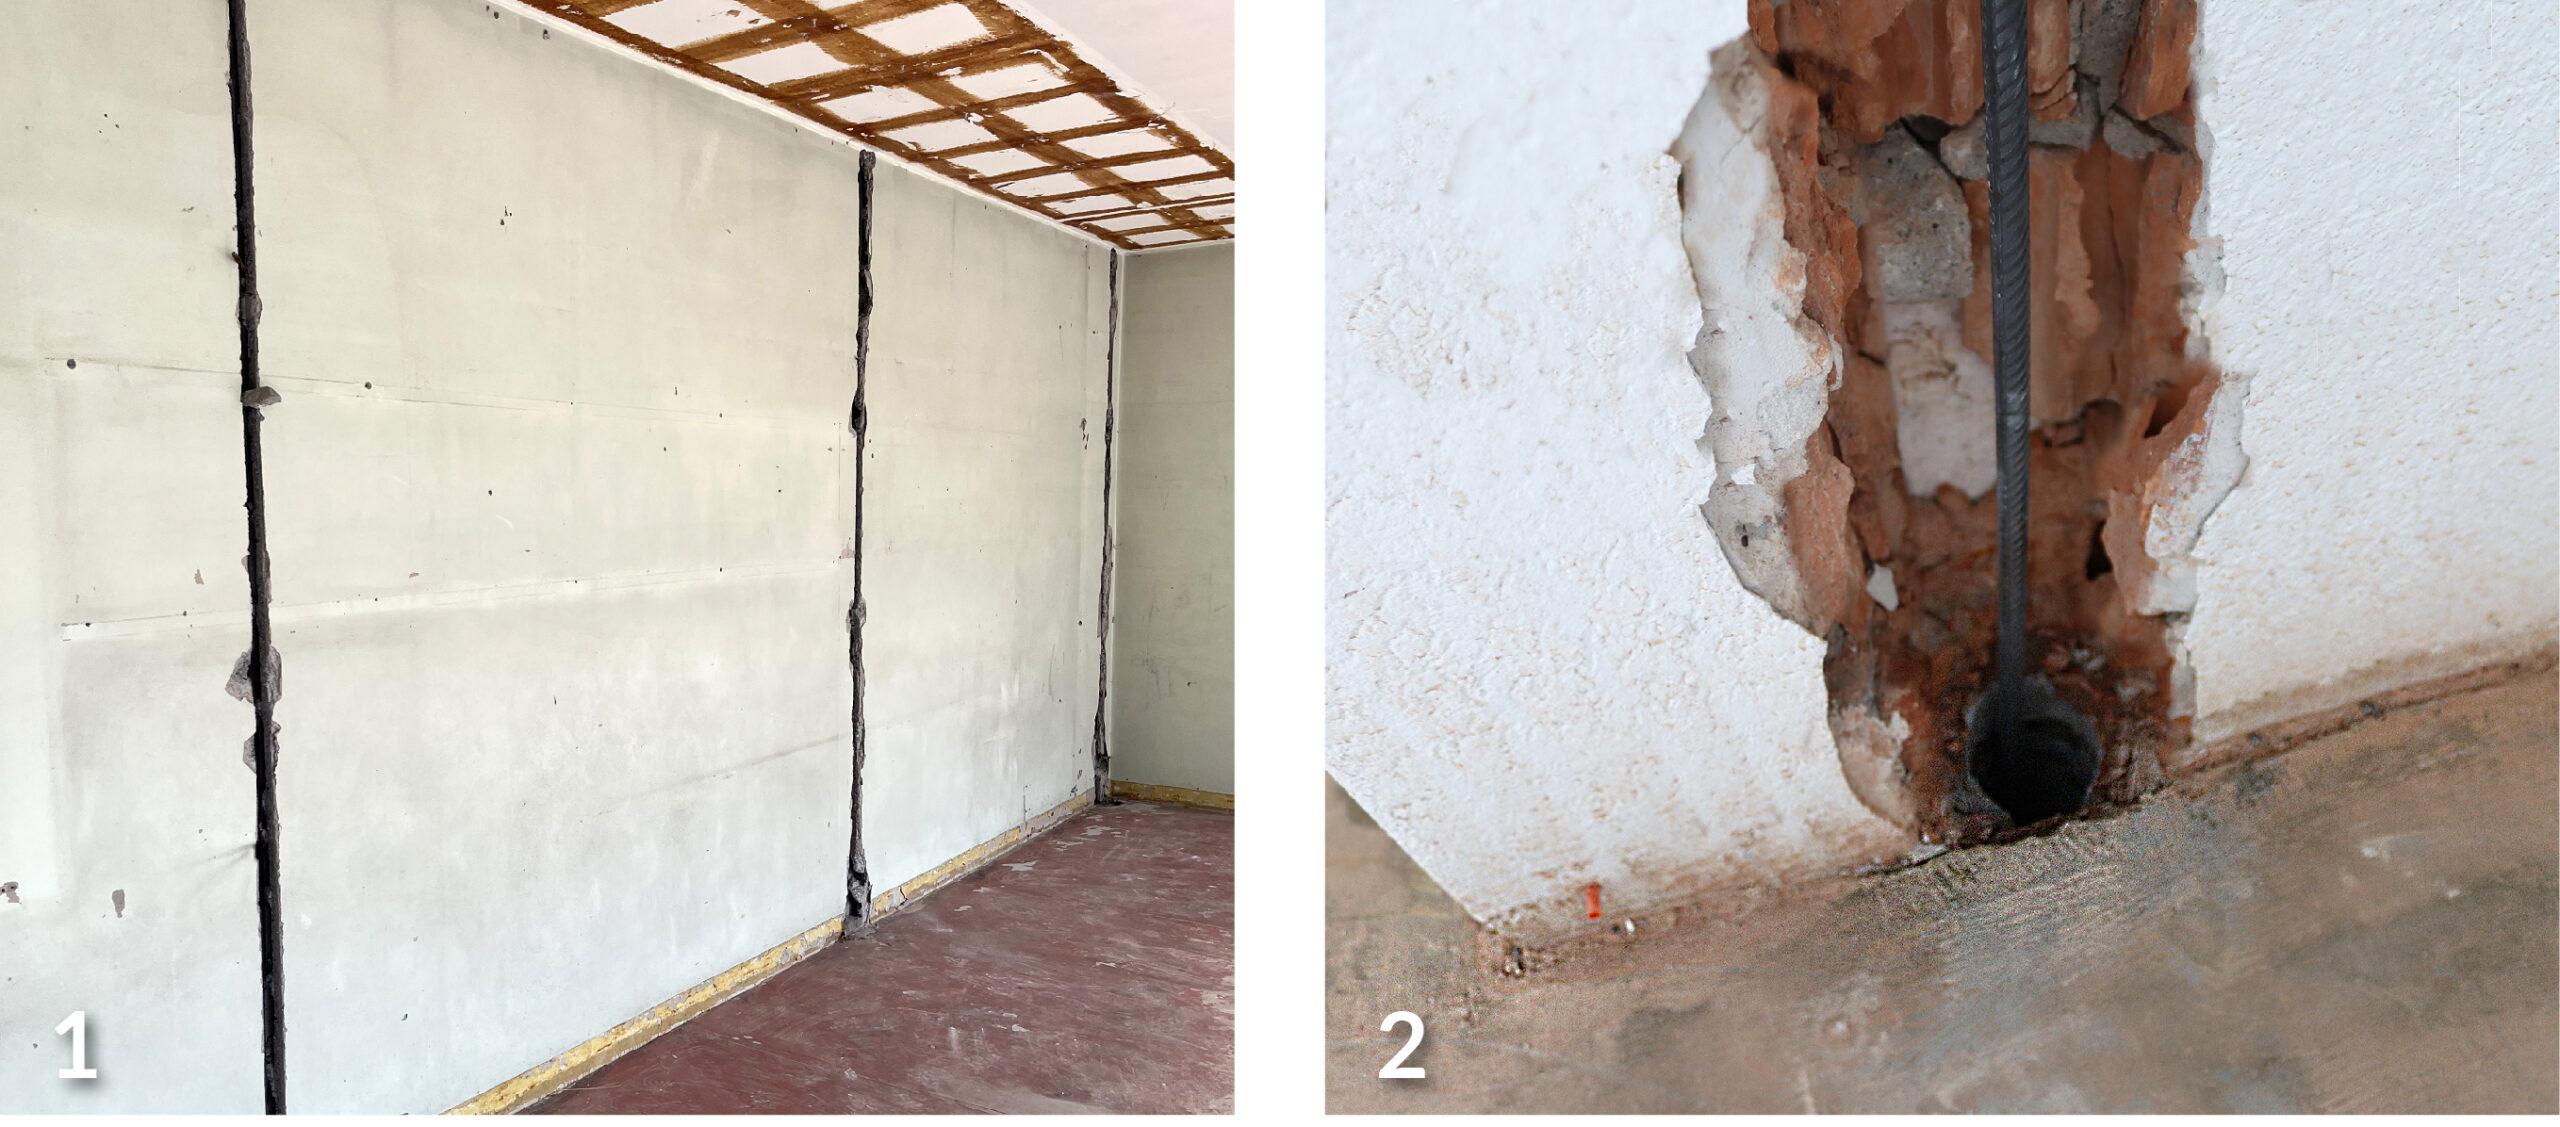
1 Cut and the groove in the load bearing concrete substrate
2 Fix re-bar centrally in the groove (e.g. with wooden wedge)
Plastic components, construction foam and chemicals are prohibited (could contain aggressive decomposition products when heated)
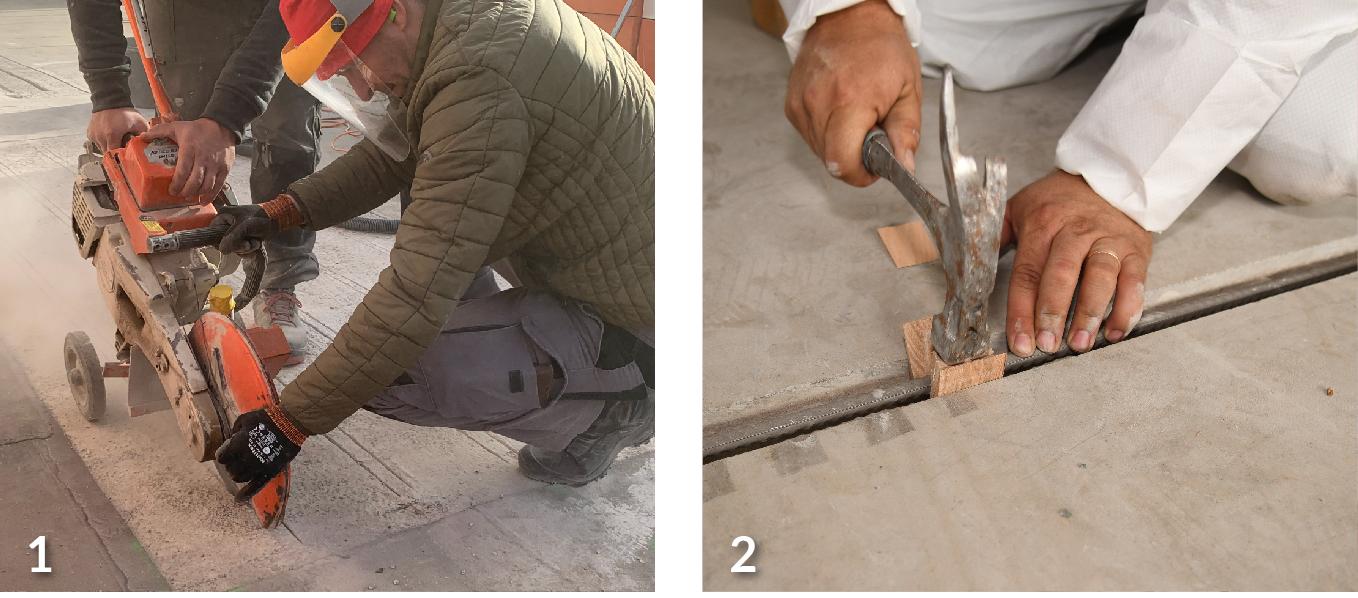
End anchorage on both sides
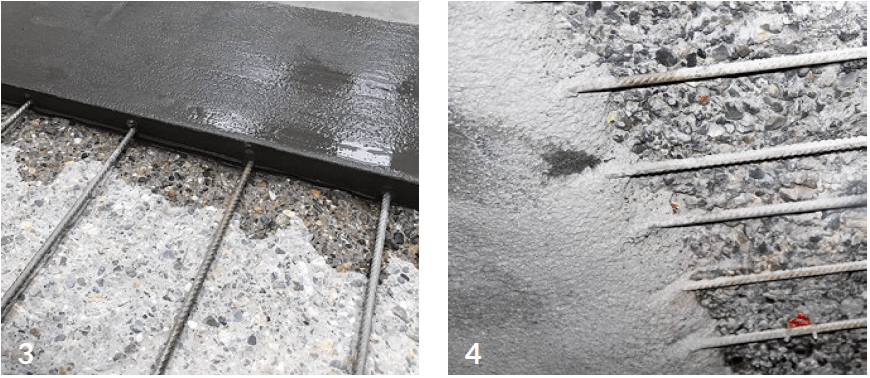
3 Bilateral (both ends) embedment in SikaGrout®-314 N grouting mortar (horizontal) or manual application of Sika MonoTop®-422 PCC reprofiling mortar (vertical)
4 Can be combined with end hooks
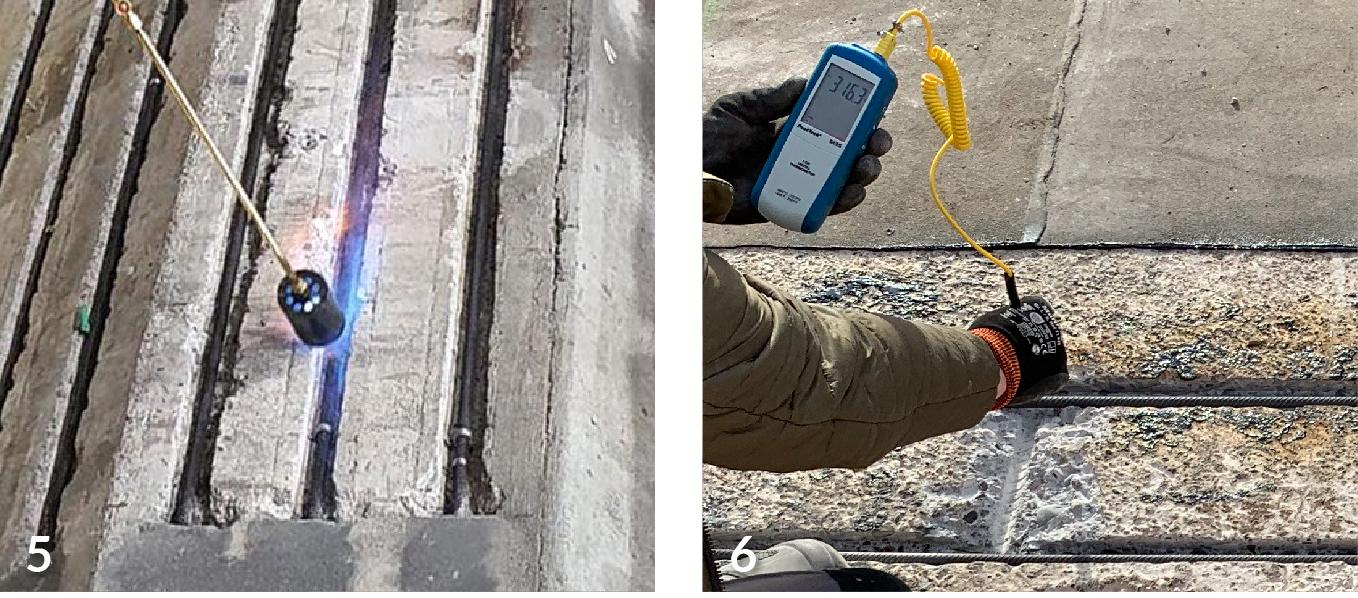
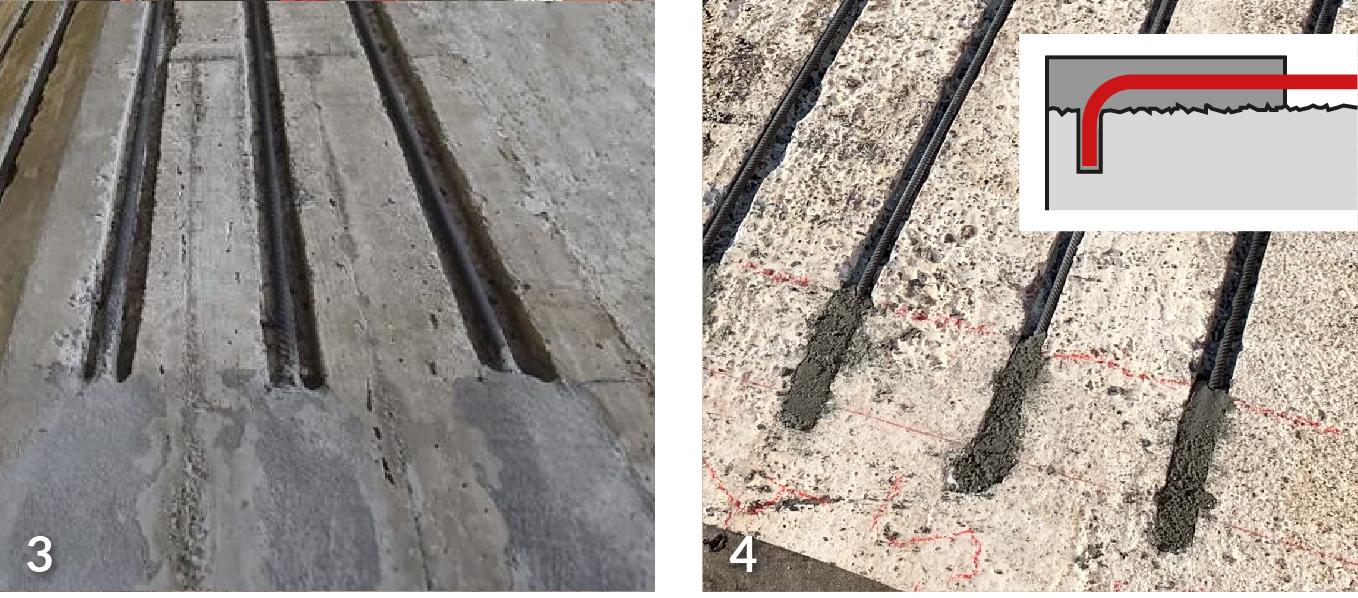
Activation of prestressing
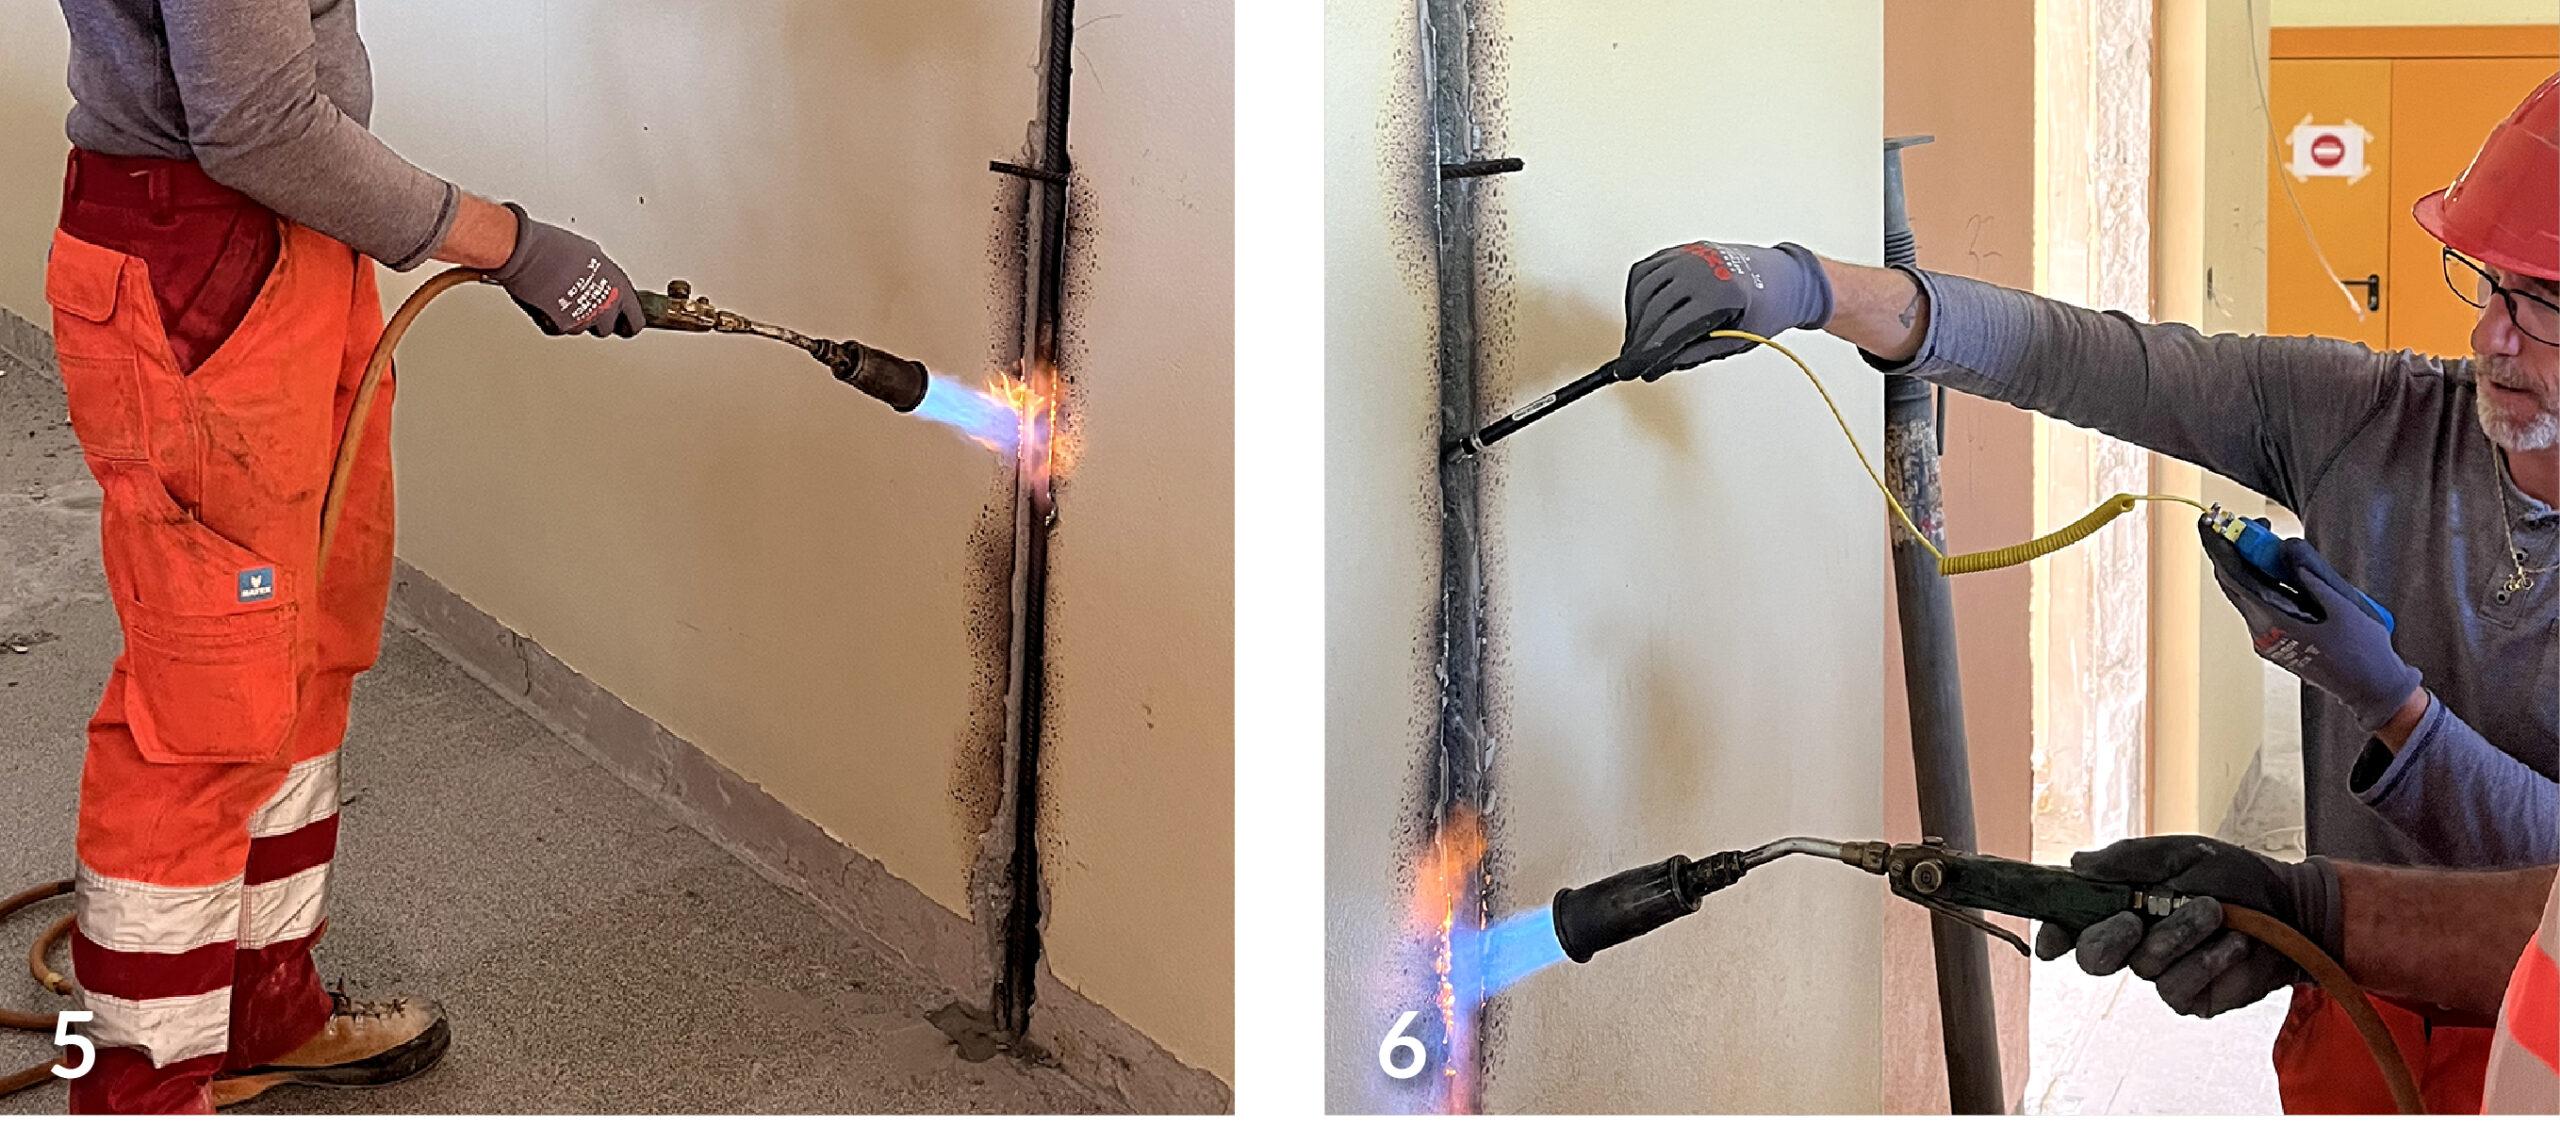
5 After mortar curing: Controlled activation/heating of re-bar with gas torch
6 Record and protocol activation temperature
Completion
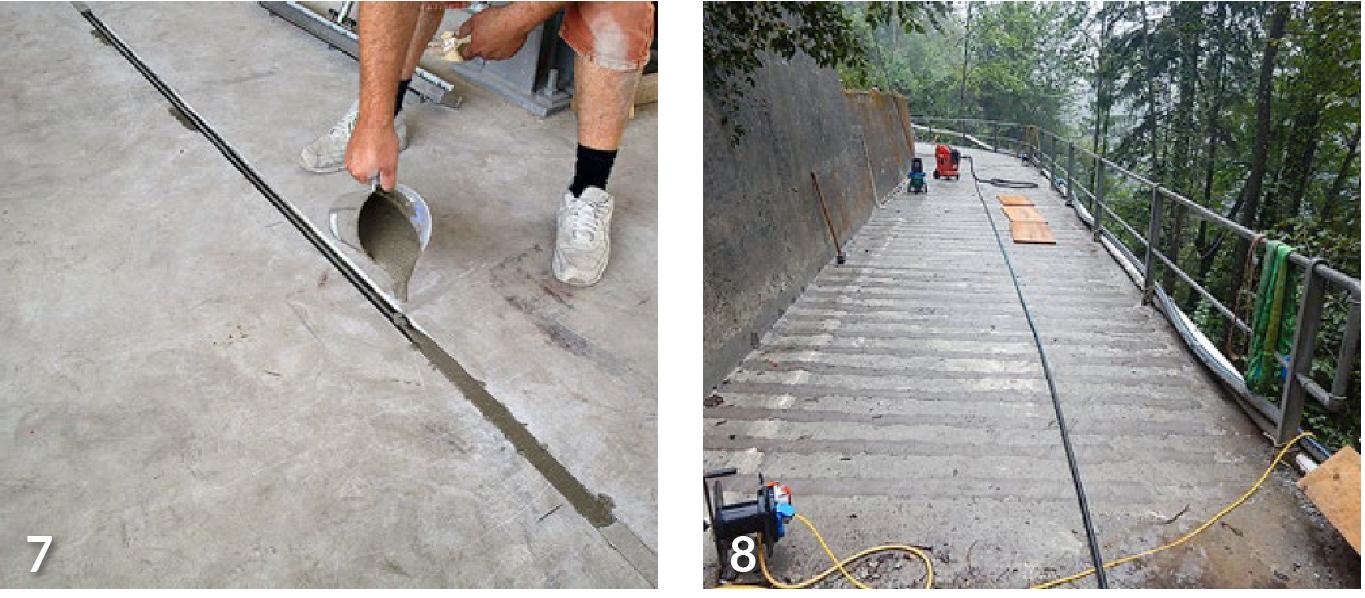
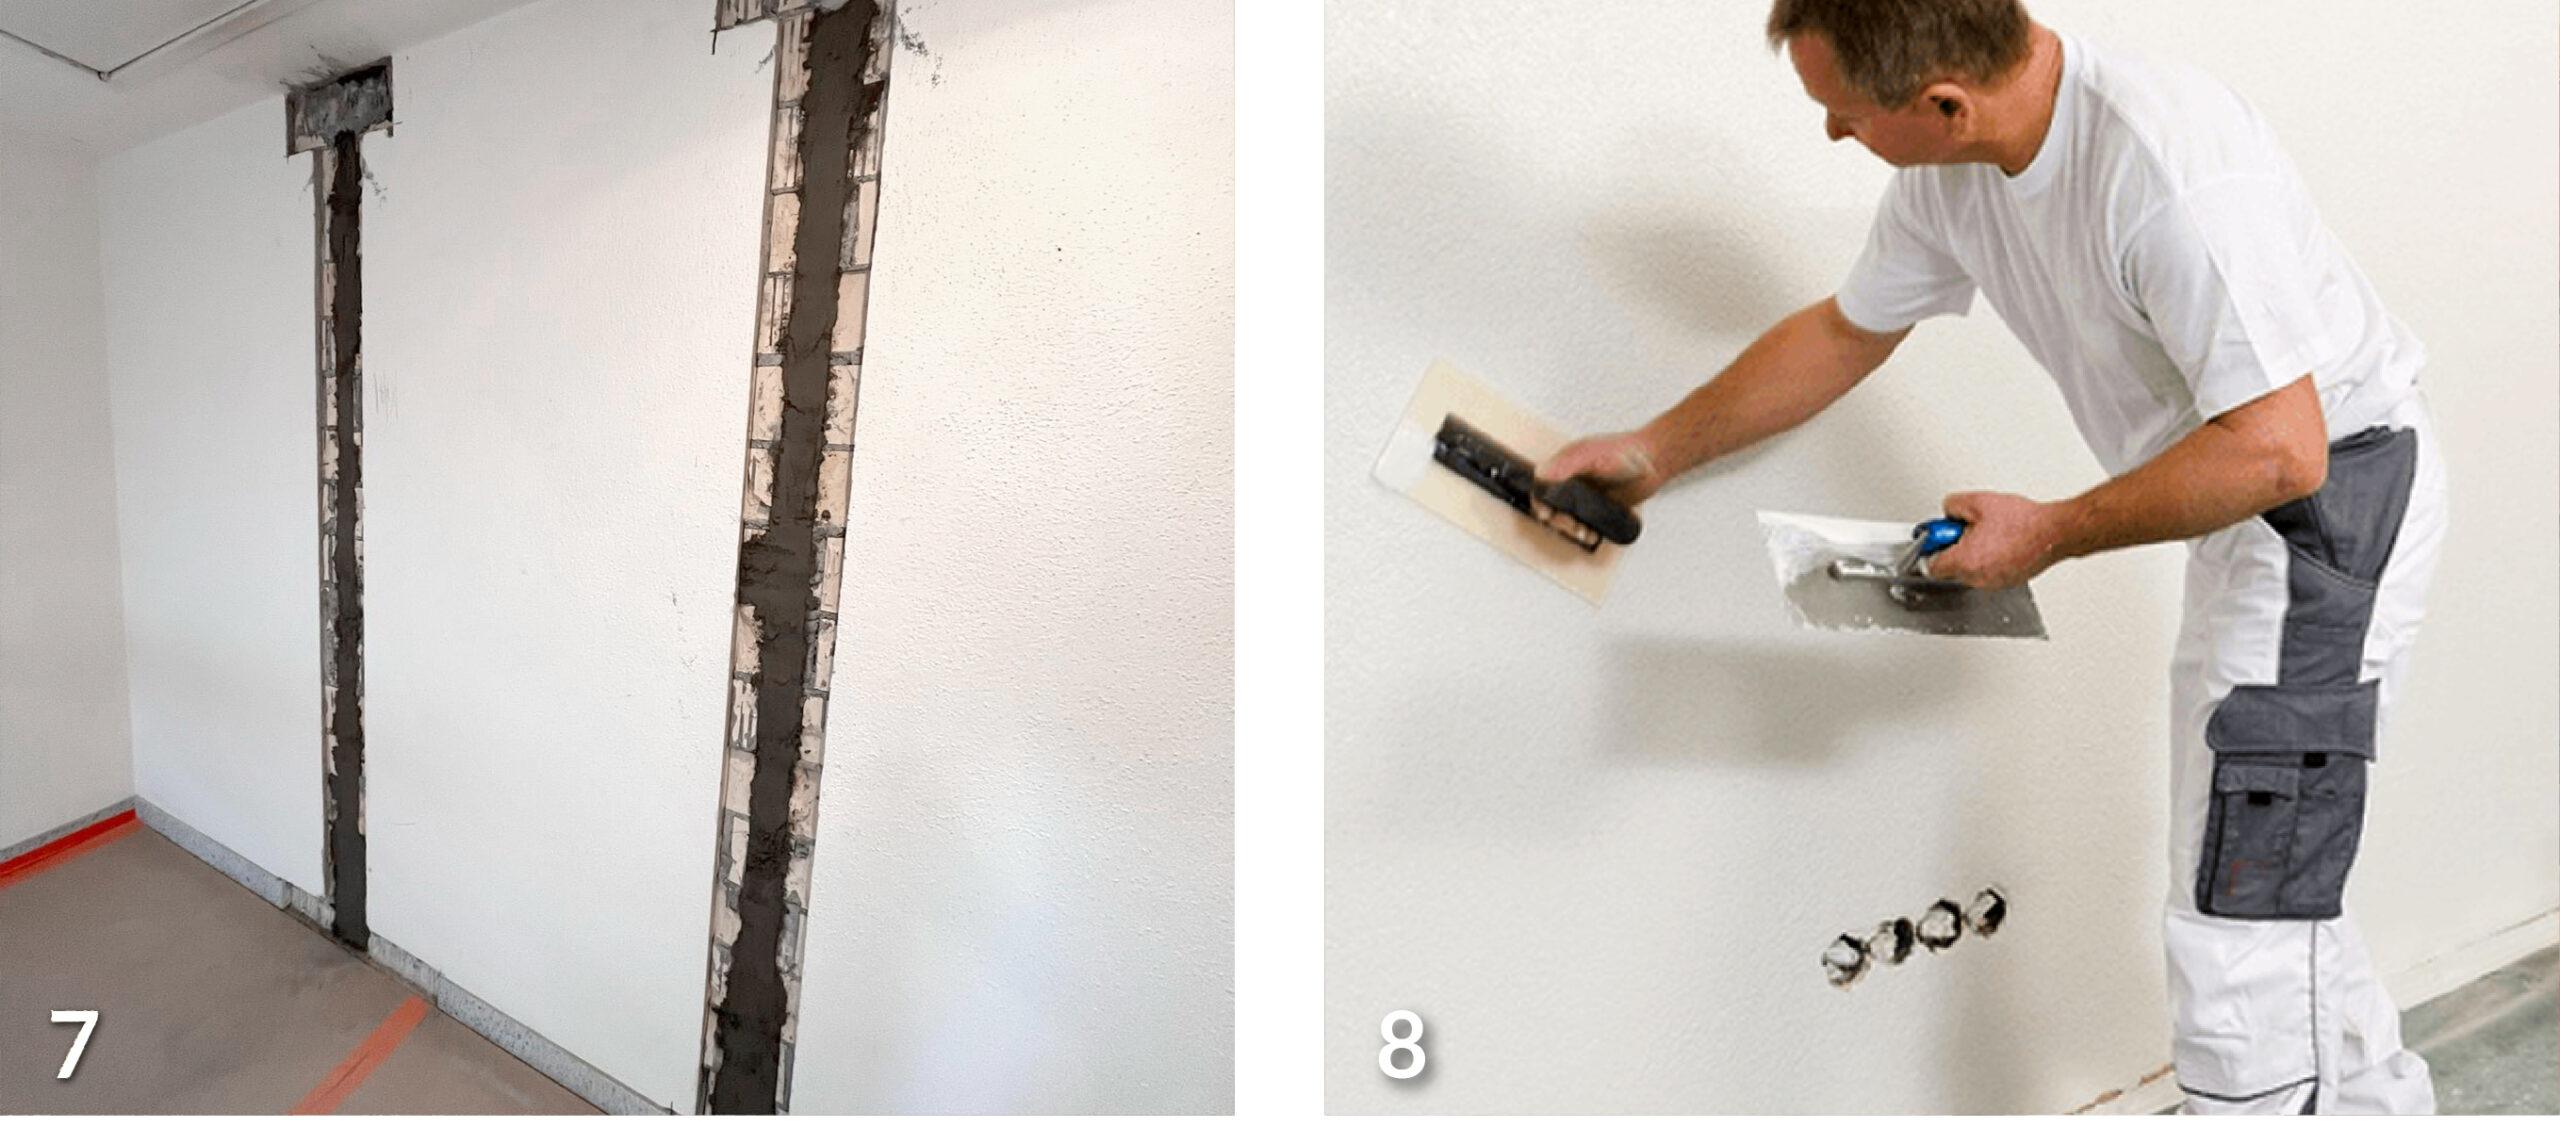
7 Grouting or reprofiling the centre area of re-bar
8 Further work (sealing, coverings, etc.)
re-bar in reprofiling mortar (horizontal or overhead)
Preparation
1 Roughen the concrete load-bearing substrate until the required roughness profile is obtained
2 Fix re-bar to the supporting base with reinforcing bars or metal screw hooks
Plastic components, construction foam and chemicals are prohibited (could contain aggressive decomposition products when heated)
End anchorage on both sides
On the deck
3 Bilateral (both ends) embedment in Sika MonoTop®-452 N repair mortar as end anchorage
Overhead
4 Bilateral (both ends) embedment in Sika MonoTop®-412 Eco/-4012 sprayed mortar or Sika MonoTop®-422 PCC as end anchorage
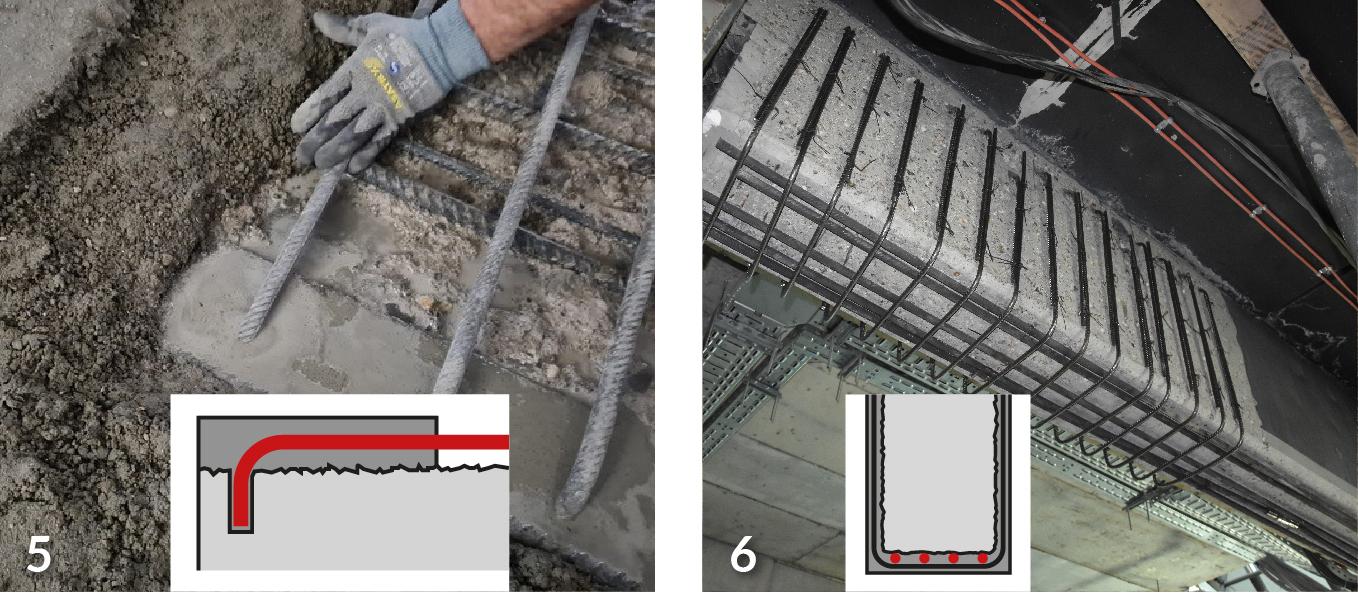
5 These anchorages can also be designed to be robust. End hooks transfer the forces in the intact core concrete.
6 The area for bonding is limited when strengthening beams. Shear stirrups reinforce the anchorages and transfer forces to the concrete compression zone.
Activation of prestressing
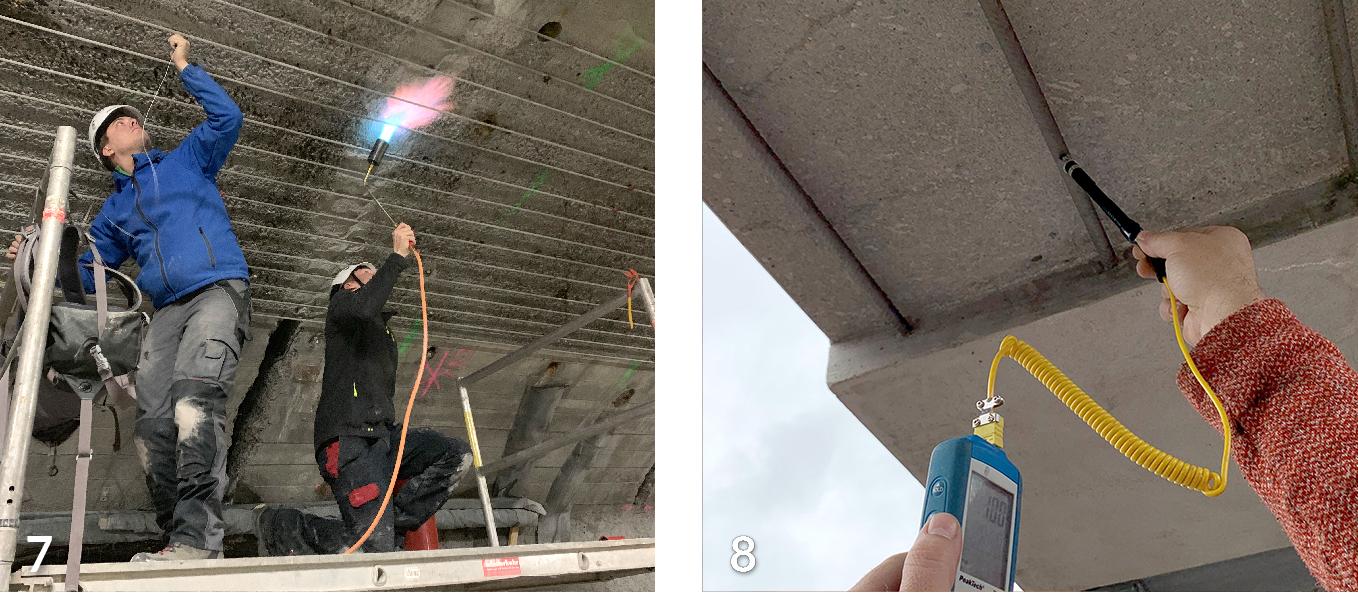
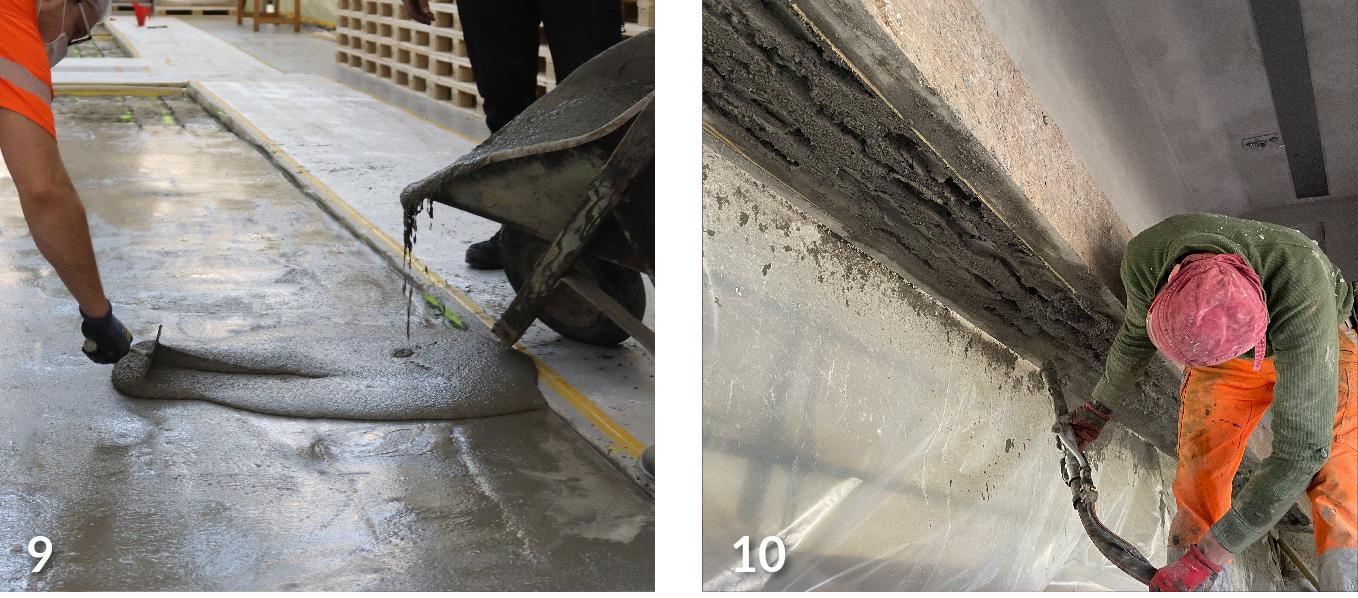
7 After mortar curing: Controlled activation/heating of re-bar with gas burner
8 Record and protocol activation temperature
Completion
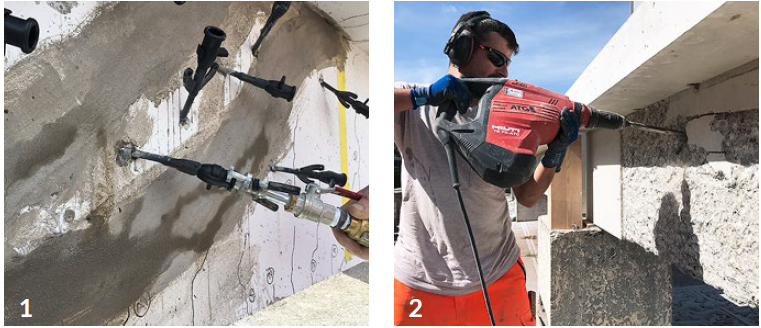
On the deck
9 Reprofiling the centre area of re-bar
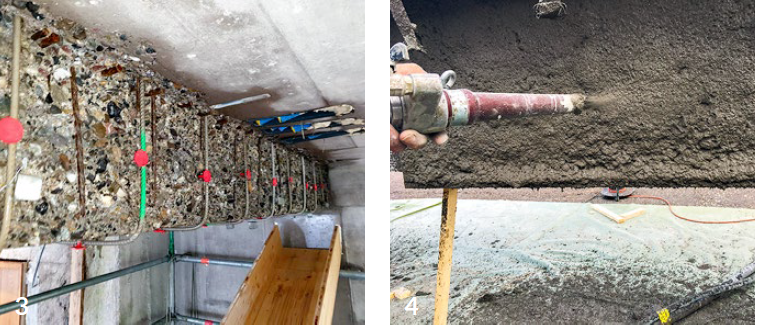
Overhead
10 Spraying the centre area of re-bar
Shear strengthening: re-bar U-profiles
Crack injection if necessary
1 Surface sealing of the cracks with Sika® FastFix-121 and injection with Sika® InjectoCem-190
Preparation
2 Hydromechanical or mechanical preparation to required roughness (sandblast first if mechanically prepared)
3 Fix re-bar shear stirrups with re-bolt special plastic dowels (for electrical insulation of the internal reinforcement)
Plastic components, construction foam and chemicals are prohibited (could contain aggressive decomposition products when heated)
Concrete repair/replacement
4 Apply Sika MonoTop®-412 Eco/-4012 by the wet spray process, pre-grout holes with SikaGrout®-314 N.
Alternatively: Use formwork, fill with SikaGrout®-314 N mortar.
Activation of prestressing / completion
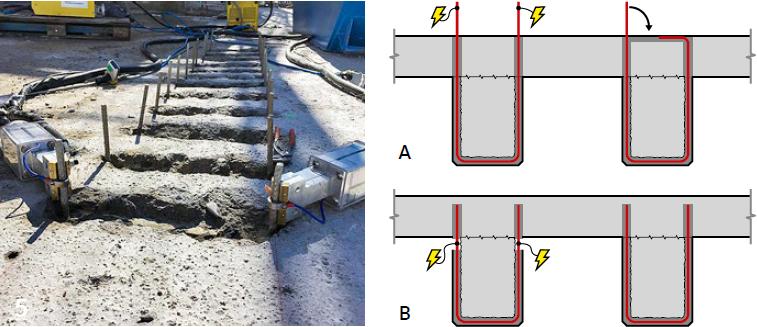
5 Activation with electric resistive heating (necessary power connection on site in accordance with the processing and application guidelines), bending over of stirrup ends and grouting

Option: activation with gas
6 Anchor the re-bar U-stirrups in mortar and heat with a gas torch
Plastic components, construction foam and chemicals are prohibited (could contain aggressive decomposition products when heated)
Seismic strengthening of masonry
Preparation
1 Cut grooves in masonry wall (if necessary, of chiseling out anchoring base)
2 Drilling of the concrete ceiling/floor slab, insertion of re-bar (fastening with wooden wedges)

End anchorage on both sides
3 Bilateral (both ends) embedment with SikaGrout®-314 N grouting mortar in the concrete
4 Alternative: Glue in with Sika AnchorFix®-3030 (Attention: heat protection before activating re-bar!)
Plastic components, construction foam and chemicals are prohibited (could contain aggressive decomposition products when heated)
Activation of prestressing
5 After mortar curing: Controlled activation/heating of re-bar with gas burner
6 Record and protocol activation temperature
Completion
7 Manual filling of mortar into the centre area of re-bar
8 Further works (plastering, painting, combination with SikaWrap® etc.)